
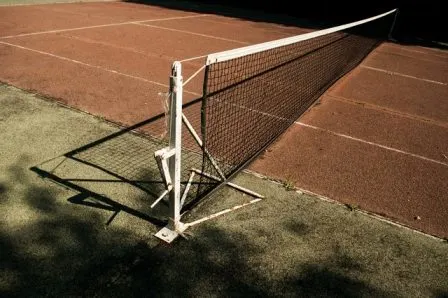
Who wouldn’t love a tennis court in their back garden?
Providing you have the space, it looks fantastic and it’s a great way to stay in shape.
And you don’t even have to leave your home!
However, while it’s a luxurious status symbol to own one, it can be expensive and time consuming to maintain it and keep it in good condition.
In this article, let’s take a look at the process of resurfacing a tennis court.
How do you know when your tennis court need resurfacing?
Here are some key signs that it’s time to call your local contractor and give your tennis court a makeover!
- Cracks on the surface have appeared or grown larger
- There are pools of water on the surface which don’t drain that quickly
- There are some raised patched on the court (bubbling)
- The color has faded (this sign on its own might mean the court just needs a fresh coat of paint, but check everything very carefully, as usually it’s a good idea to resurface and repaint the court all in one go)
How long does it take?
It depends on the current state of the tennis court, but on average the whole process should take just under a week.
However, if there major issues such as some drainage concerns or a slope on the court due to faulty construction in the first place, the process can take longer.
How often do you need to do it?
Again, a lot depends on how often you play on the court, the surface type and most important of all, how well you maintain it over the years.
For hard courts, removing debris, mold and fungus regularly and pressure washing from time to time, will ensure you don’t need to resurface that often.
Also, if the tennis court was originally constructed poorly, you might need to resurface every 4 years or so.
However, with a well maintained court, built on a solid base, every 8 years might be ok.
In short, look after your tennis court on a regular basis. It may save you $1000’s over the years by not needing to resurface as often.
How To Resurface a Tennis Court
Here’s a recommended process for resurfacing a tennis court from start to finish.
Check the existing surface first in detail
This first step is arguably the most crucial.
Inspect the court surface carefully, check if it’s level and see if there are only a few cracks. The resurfacing process is a lot simpler if the foundations are good. In most cases, the contractor just needs to apply a new layer on top.
However, if there are some more severe problems and the surface is completely falling to pieces, or it’s clear there are issues with the foundations of the court underneath, you’re better off building a new court from scratch.
No shiny new tennis court surface will improve things for long if the court was poorly constructed in the first place!
Choose your surface
You’d be amazed at the choices you have for different tennis court surfaces.
As most people have hard courts, because they are quite easy to maintain, porous macadam is a very popular choice. You just simply pour it over the older surface and let it set, unless there are some more serious underlying issues with the existing court surface.
If clay is your thing, then you can opt for a synthetic clay surface, which is fairly realistic when compared to an actual clay court. In fact, even if you have a basic macadam surface underneath, if it’s in a fairly good condition you might be able to simply add this synthetic clay on top.
You can do a similar thing with synthetic grass and just lay it over the top of the older macadam surface (if it’s not in too bad a shape)
The other choice you have is to use porous acrylic. Acrylic is quite durable and might be a good choice if you live in areas with more extreme weather i.e. frequent hot summers, harsh winters or torrential downpours.
Here’s a video showing the resurfacing process in detail using acrylic:
Paint the tennis court
Once the surface has been laid, it’s time to paint the tennis court.
You need to choose the right paint type and ensure you use either an airless sprayer (the fastest way) or a double roller, when you apply it.
Add line markings
Use a special taping machine to mark either side of where you want to paint the line markings. Apply some primer and paint the lines. Remove the tape when you’re finished for a nice smooth and straight finish.